Hot to setup an static IP address in you Raspberry Pi.
Until Raspberry Pi OS version 11 (bullseye) we could setup a static IP Address by editing the file “dhcpcd.conf”. In current versions this is not possible anymore.
I will explain in this post how you can configure your static IP Address in version 11 (bullseye) and version 12 (bookworm) of Raspberry Pi OS.
Raspberry Pi OS Version 11 (bullseye)
To setup your Static IP Address in this version, you will need to edit the file dhcpcd.conf.
Before we edit the file we need to check our network interface name, we should also have an IP Address in mind and our gateway.
To check our interface name use this command, this will show you all your network interfaces available, it will include virtual interfaces like Docker containers for example.
ip a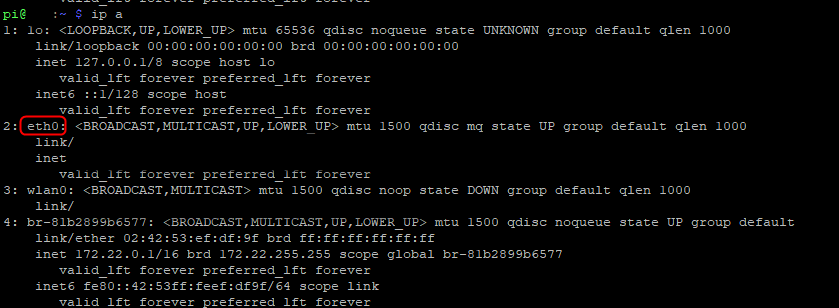
In my case, I will chose my ethernet port which is “eth0”.
To configure this in our file we will need to use the following command
sudo nano /etc/dhcpcd.confThe file will open in edit mode and you need to scrool until the end of the file and insert the following lines
interface eth0
static ip_address=192.168.1.2/24
static routers=192.168.1.1
In my example i choose the ip “192.168.1.2” for my Raspberry Pi ethernet port, the 192.168.1.1 is my router IP Address.
After setting this up, you can also set it up for your wireless interface, you can close the editor and save the file by inserting the following commands
ctrl + x (close nano)
Y (confirm and save the modifications)
Enter
Now your Raspberry should have a Static IP Address.
Raspberry Pi OS version 12 (bookworm)
To setup your Static IP Address in this version you will need to start the NMTUI (Network Manager TUI)
To launch the NMTUI app inset the following comand
sudo nmtui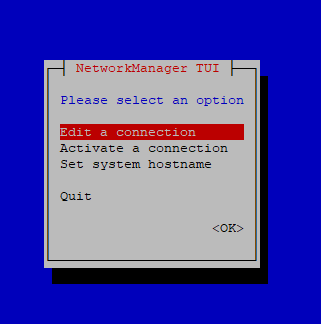
Now you will navigate this tool using the arrow keys on your keyboard. Enter in the “Edit a connection”
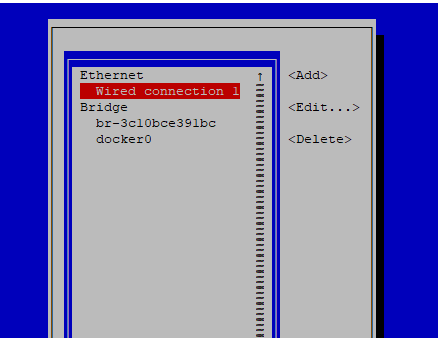
Inside your connections menu you can choose the interface to change. In my case I will use the “Wired connection 1” which is my ethernet port.
Inside the Edit Connection of my wired connection 1 interface you will find a dashboard similar to the one below.
In this you will change the “IPv4 CONFIGURATION” from “Automatic” to “Manual”, then you will insert your Static IP Address, Gateway and if you have or want, your DNS Server.
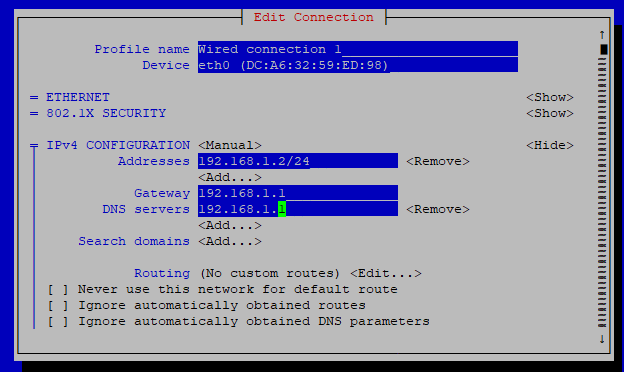
After setting this up you can scrool all the way down and confirm with the “OK” button. Please remenber that all of this is navigated with the arrow keys.
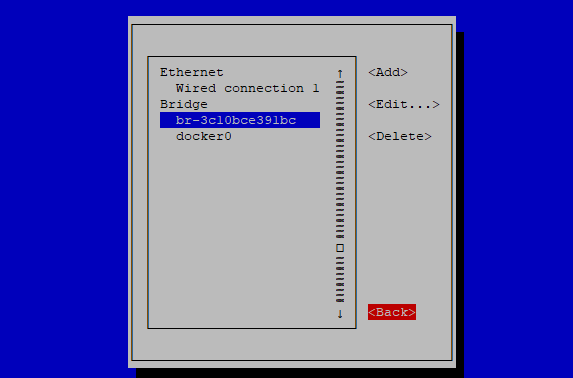
Now you are back at the Connections menu, you can select “Back” to return to ~the main menu.
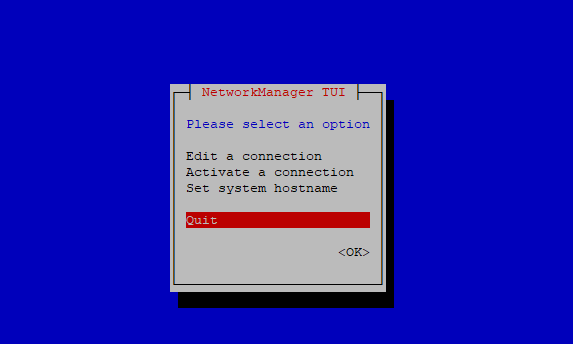
Now you can exit NMTUI. You may be asked to reboot your Raspberry Pi.